Thursday 27 January 2011

Building a background for a vivarium!


While we were debating about getting the new viv, wifey had been looking up various threads in the Reptile Forums habitat forums . She came across a number of threads involving owners who built backgrounds into their vivs and how they managed it, some of the threads involved re-creating the pyramid from aliens vs predator aswell as other exotic looking backgrounds. 


This is not the same sort of story, but let us begin our journey anyway. We decided to start off simple and went and bought some polystyrene, cement grout, silicone, coctail sticks, eco friendly clear varnish, stone texture spray paint aswell as some tester pots of paint. Firstly we measured the viv and decided to build a back ground that would cover the back and part of the sides (to provide more cover for our smudge).
Construction begins, we used the cocktail sticks to hold the structure together, before siliconing them.
Once we had the background sorted out we decided how many shelves we were going to have aswell as where we were going to place them, to get the edges wavy and to cut the polystyrene in general we used craft knives.
 
One shelf, Ha Ha Ha.
 Two shelves, Ha Ha Ha
 Close up of a shelf that has been sculptured using the craft knife.
Lots more shelves and on the right side of the picture a hide.
As you can see from the pictures above, I started attempting to sculpt the edges of the shelves to give them a much more realistic look.
  Many more shelves plus steps!
Just a little readjustment.
And finished for the moment.

Once all the shelves were in place we then went about siliconing them down, this was quite tricky as we wanted to leave the cocktail sticks in place to provide extra support, we also realised at this point that the hide lid would have to come off and be attached later otherwise the insides of the hide wouldn't get properly covered in grout and varnish.  Once the silicone was dry (this took a few days to let the fumes clear also) we went about grouting the back ground this didn't go to well to begin with as the grout wasnt sticking to the polystyrene, so what we did was found some old powder grout mixed it up and applied that first as it was more watery and easier to apply, then watered down our the cement grout slightly and applied it again.
 After attempting to put the grout on without watering it down, didnt go too well which is why the back only got done.
 After removing the hide lid, we were able to grout everywhere successfully.
 Grouting in progress.
 The contrast of colours of the different grouts used.
Finished with first layer of grout.
As you can see from the previous pictures the old powder grout was of a completely different colour but that was ok we knew we were going to cover it over with the cement grout which would be a better colour and texture.  When watered down the cement grout was easily applied with brushes (we bought cheap ones which we wouldn't mind chucking away after wards).
 And so the next layer of grouting begins.
 A look at inside the hide.
 More grouting.
 Nearly done.
Voila! finished, the non grouted line you can see is where the hide lid would be placed.

Once finished grouting, we then attached the lid to the hide and added some more grout to cover the joins, we also sprayed some of the textured paint spray and added some extra colour to make it look more realistic.  Once fully grouted we then applied about 3-4 coats of eco varnish; we purchased eco varnish mainly because we were concerned about the chemicals in varnish, online forums will usually recommend yacht varnish but we were unsure of where to purchase this and others did say as long as you gave the background time to air before putting it in your viv then alternative varnishes were ok, which is why we bought this eco friendly varnish we found in B & Q.
The finished product unfortunately we don't have any others of it with paint on etc.
This is not the end of our tale though, although we did measure it, when we tried to place it in the viv, wifey hadn't accounted for the front of the viv being that the doors start halfway up and unfortunately we couldn't squeeze it it through the top, so it had to literally have a third sliced off and be readjusted before it would fit!  Unfortunately we don't have any pics of what it finally ended up looking like but I will hunt around and see if I can find it somewhere.


Saturday 22 January 2011

Introducing Flick and our new vivarium


The last thing a cricket ever sees!


Apologies for the lack of posts over the last week, my life has been turned upside down, or at least my work life! 

So I have decided to do a few posts today in order to make up for it. I want to cover the new vivarium and some of the steps we went through in order to create a new background.

So after a few months, around June 2010, we decided that Smudge was getting a little too large for the original habitat, and we decided to buy a larger vivarium. 

The original plastic vivarium (I'm going to shorten this to viv from now on, ok?) was pretty low and pretty narrow front to back, so we could rest it on our shelving unit with no problems at all. We decided to get a larger viv which would allow us to add more branches and foliage for Smudge to climb on/around.

So we went off to Southern Aquatics in Poole again (link below) with Mother-in-law and Brother-in-law in tow and looked for a nice large viv. 
We settled on a 60cm by 45cm by 45cm Glass Terrarium with front opening double doors, simply to make it easier to re-arrange the foliage / hides etc instead of taking off the top each time like the plastic viv. It had mesh on the top for ventilation and came with a polystyrene background shaped and coloured to look like a rock face. 

While we were at Southern Aquatics, my mum-in-law saw a tangerine albino leopard gecko and fell in love with it. We debated how well the gecko would fit in with the 4 dogs, 2 cats, hamster etc that mum-in-law had, but she eventually decided to get it and named him ( we checked, it was a he, not like smudge where for 3 months we weren't quite sure!) Flick.

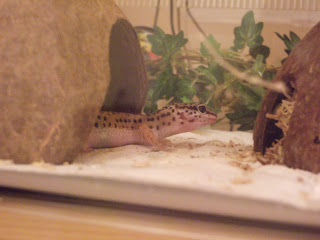
(Unfortunately we haven't got any pictures of Flick: the early years, so the picture you see above is much more recent.)

We all decided that Flick should get the old plastic viv that we got with Smudge and that as we already had most of the supplies to care for a gecko, mum-in-law did not need to get a starter pack but instead should only get a couple of hides, a thermometer and a water dish. we also bought a (bigger) heat mat for our new viv. When we got home we realised the new viv would not fit on the same shelf as the old tub, so I had to move one of the shelves down to accommodate Smudges new home (thank goodness for DIY shelf units!). 

Ok so next post will be regarding Flick settling in and the setting up of Smudges new home.


Link to Southern Aquatics: 


The Terrarium we actually bought:


And here it is available at Southern Aquatics. When we got it it was £55, which is pretty good considering its RRP is £111.59!          

The New Viv, looking pretty bare at the moment, you can just make out Smudge peeking out of the right rear Hide


Thursday 13 January 2011

Nocturnal activity and shedding


So I thought I would mention a little more about Smudges general behavior and a bit about her growth and what we did and didn't expect.

Smudge is rarely seen in the daytime, and unless we disturb her, or make a lot of noise or give her some food, she will stay on the warm side of the habitat and in the darkest shelter available, since we bought her a 'rock' type shelter she is usually in that one. 

Generally at night time, if we have not already put food in, smudge will come out and start wandering around in a manner that indicates that she wants feeding. Since the vivariums we have had for her are generally glass, or at least see-through, at the front, if we are staying up late and so have the lights on we will put a towel over the front to give a little shade for her to hunt.
So most days we feed her between 8 and 9 pm, and on occasion we will give her another small feed in the morning if it looks like she has finished off the food from the night before, or if she is poking her head out looking for food! 

The only time she hasn't eaten at all is the days when she sheds. This is a natural process and allows the gecko to grow. When shedding they like to have a shelter filled with damp moss, presumably so they can rub themselves against the moss and rub off the shedding skin, or perhaps just to stay moist while shedding. Geckos, unlike some snakes, eat their old skin, so don't expect to find a perfect gecko-suit hanging up in the shelter when you clean them out ("look at this old thing, why don't you throw it out, you can't even fit into it anymore!!")

When we first got Smudge she would shed about once every two or three weeks. Smudge would start to get paler and paler, almost as if she was getting dusty! Then she would disappear into her shelter for one or two days, not coming out even to eat. 

Then all of a sudden she would pop out, her colouring brighter than ever, and usually with a slight change of spot pattern, and be back to normal. Occasionally she will still have a little skin left around her feet or on her head where she can't reach it, but it usually falls off in the following days. we once had to remove some skin from around her mouth when it was still there a week later, but we just used a cotton bud dipped in water to rub it off, and she was very still and well behaved while we did. 

(BTW my mother-in-laws gecko, Flick, is not as shy and retiring as Smudge, and, apparently,  sits in the middle of the vivarium and simply tears off the old skin and eats it, in full view of everyone!)
I imagine that the frequency of her shedding might be due to the amount she eats and therefore grows, as Smudge was certainly eating a lot over the first few months.

At the moment she tends to shed about once every four to six weeks, and the frequency is definitely decreasing. Below is a picture of Smudge in her just prior to shedding state:

Tuesday 11 January 2011

Eating habits and other stuff

So we also bought a tub of mealworms soon after we got Smudge, and it certainly was easier fishing them out of the tub to feed her.

When we first started feeding her crickets, we were trying to use tweezers to take them out of the tub individually and put them in a bag (we put them in a sandwich bag in order cover them with Nutrobal, add a pinch to the bag and give it a shake, instant yummy nutritious insect treats!), needless to say it took a long time feeding her each evening! since then we have moved on to easier and faster methods of separating crickets for each feed).

The mealworms were also great value! Since we got Smudge we have probably bought between 20 and 25 boxes of crickets and or locusts, however we are still on our second box of Mealworms, the first box lasting us 4 or 5 months!

We can give her 5-7 worms a day, or just a couple along with some crickets, and they can sit in the feed tray (upside down marmite jar lid!) until she is ready to enjoy them. Keeping the box of worms in the fridge ( in the Salad Crisper section, as it has never been used for storin Salad it was the logical choice!)

Sorry about the short post, more later about nocturnal activity (Smudge, not me) and shedding.

Add to Google

Thursday 6 January 2011

Weeks go by...

After the first few days, we realised the stick-on, dial type thermometer was probably; a) not accurate enough and b) only measured one area. This wasn't helped by wifey sticking the thermometer to the Outside of the tub! We got a digital dual-zone thermometer from ebay, a Lucky Reptile Digital Thermometer (LTH-31) which was around £10.

We considered using a theromstat in order to turn the heat mat on and off (leopard geckos need a temperature approximately between 29 and 34 deg C), but the temperature stays pretty stable most of the time, and it never dropped too far, even with all the snow we had this winter!

The biggest problem we had with the thermometer was how to arrange the probes, we wanted one at each end of the tub, but didn't want the wires getting in Smudges way. We ended up threading them through the gap between the lid and the back of the habitat and placing the probes behind the Coconut shells, out of the way.


Add to Google

Tuesday 4 January 2011

The first few days

While Smudge didn't eat very much for the first few days, we attributed that to the stress of moving and settling in to a new environment.

As I said previously, we decided not to use the bark chips as substrate, since the leopard gecko book we bought stated that young geckos can ingest the chips accidentally whilst eating.

Smudge seemed happy with having kitchen towel as the floor covering.

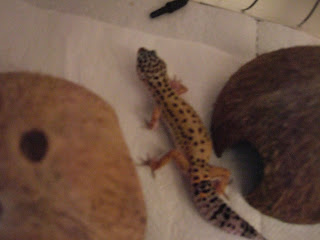
We taped the heat mat to the underside of the left half of the habitat to create a warm end and a temperature gradient. After adding the water dish and the coconut shells, the habitat looked  pretty crowded, but it seemed as though Smudge was quite happy, as you can see from the photos below!

We started her off on around 7 crickets a day, which apart from the first few days, seemed fine. When we did put more crickets in she would not finish them off, so we were happy that we were giving her enough to eat.

Just a quick note about the previous photos, its so strange to see how small she was when we got her, her whole body could fit across the width of my hand!

The last photo in this set is one of our favorite photos as it shows smudge just about to pounce on a cricket, whilst perched on the side of one of the coconut shells!

On this photo you can see the wires underneath the tank for the temperature sensors (post coming soon!) and the heat mat.

Up close with young smudge! The shell on the right is full of Moss (more about that later too)


Add to Google

Saturday 1 January 2011

How it all began


We live in a flat so we can't really have a cat or a dog but that never stopped my wife and I looking around petshops at all the available animals and discussing when we get a house what we're going to buy first, as my mother in law on the other hand has lots of pets (dogs, cats, fish etc) we tend to use that as our main excuse for visiting pet shops.

So on Easter weekend 2010 we all had decided that we should visit southern aquatics in Poole (as the nearest Southern Aquatics had closed down and we had not yet visited the Poole branch). Imagine our surprise when we saw not only the usual furry critters but also lots of scaly ones too!! And that is when we first saw Smudge.  We had never even considered reptiles as pets before, but here was this adorable little gecko that was just begging to be taken home.

Very conscientious of the fact that it was probably a very impulsive thing to be doing, we decided that really if we were going to do this we should look at all available options, so we left the petshop and visited some other reptilariums in the area. We realised that the prices at other shops were more expensive and the gecko's we were shown were either older or the geckos available were not the colorful leopard geckos but other species. By this time wifey was in a complete tizz that Smudge would be gone by the time we got back to the shop.

A fast journey back to Southern Aquatics and we're politely asking could we please buy that particular gecko who we would come to know and love as Smudge.
We paid £75 for a starter kit that included the habitat, coconuts (for shelters), woodshavings (which we didn't use as we were concerned such a young gecko might accidentally ingest the shavings), a box of crickets, spagnum moss, heat mat, water dish and nutrobal (a nutrient dust with which to coat her food). And also Smudge!


We also decided to buy a book about Leopard Geckos, as we had no previous experience, called "The Leopard Gecko Manual" (I shall add a link to where you can get it later)
One of the first times we handled her.

Exploring her habitat.

Popping out of her coconut, on the warm side of the tank.

Add to Google